
Trying Out OpenClaw - Setup and First Impressions
I. Introduction
The rapid rise of OpenClaw on GitHub is nothing short of impressive. We have gone from asking, ‘How can AI help me with my tasks?’ to wondering, ‘Will AI replace me in the future?’
In just a few months, OpenClaw has amassed over 250,000+ stars, making it one of the fastest growing and most starred non aggregator projects on the platform, surpassing major projects like Linux and React in growth rate.

This surge in popularity highlights the strong interest in AI and automation within the tech community.
In this guide and first impression, I’ll walk through the installation process, share how I personally use OpenClaw and set expectations on what you can get out of it (particularly from a security perspective).
II. What is OpenClaw?
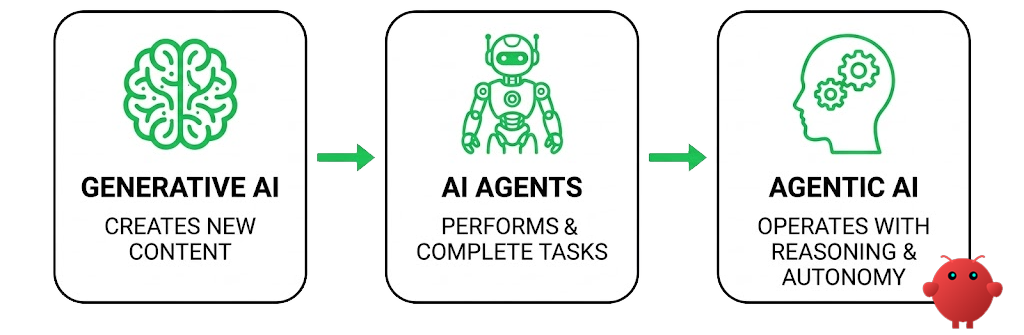
AI has evolved fast, from creating content based on prompts (Generative AI) and performing tasks within set boundaries (AI Agents). Then comes Agentic AI: capable of making decisions and acting independently.
OpenClaw is leading the charge in the Agentic AI era. It goes beyond simply responding (it can plan, prioritize and carry out tasks independently) demonstrating the true potential of AI.
OpenClaw bridges the gap between conventional AI agents and fully autonomous systems with features like:
- Self-directed actions: Operates without waiting for detailed instructions.
- Task chaining: Handles multi step workflow.
- Context awareness: Maintains continuity across tasks, adapting to evolving situations
III. What You’ll Need
To get OpenClaw running, you don’t need enterprise level infrastructure. Here is the configuration I use to keep things running smoothly.
1. OpenAI API Key
This serves as the primary engine/brain for OpenClaw’s reasoning and linguistic processing. It is used to facilitate autonomous decision making and strategic planning.
The minimum amount to top up your account is $5. If you are just curious and want to test the system, this is enough to get started. Below is the current pricing for openai api as of this writing.
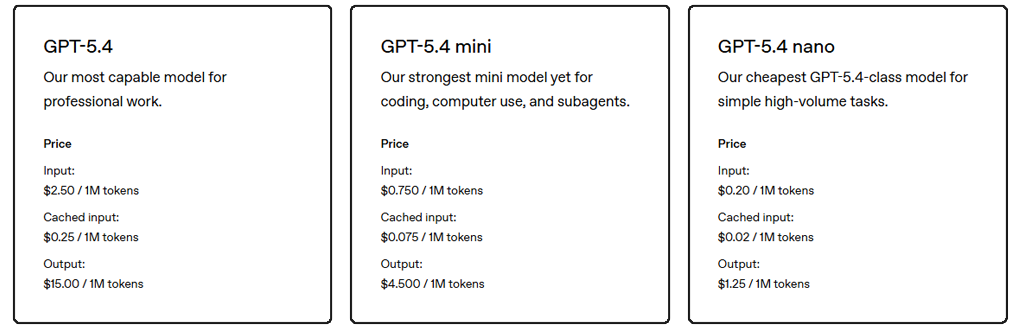
Your actual spend depends on the specific model you choose and the complexity of the tasks you assign. Technically, you can run OpenClaw using a local LLM on your own hardware to avoid API fees. However, since I don’t have a spare high-end PC dedicated to host it, using OpenAI is the most practical and efficient solution for my setup.
2. Hardware (Dell OptiPlex 9020M)
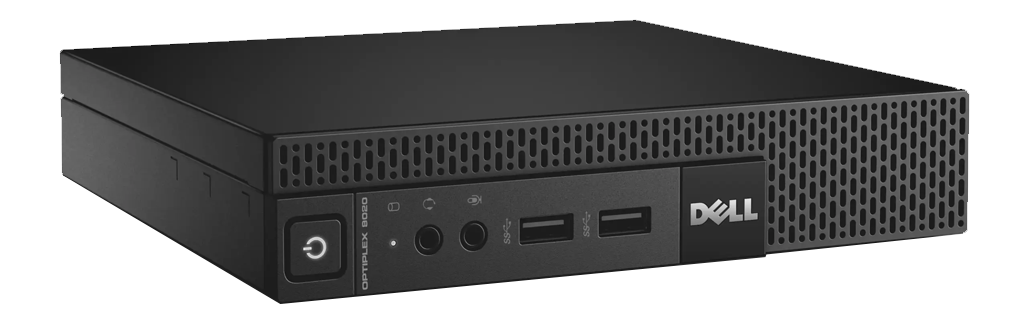
For my setup, I repurposed an old mini PC that was sitting unused. This is a zero budget alternative, since I didn’t want to spend money on a VPS (Virtual Private Server). After installing a fresh OS, the machine was ready to handle agentic workloads.
⚠️ Security Note: If you’re comfortable with the risks, you can certainly run OpenClaw on your primary PC. However, for most users, a separate machine is HIGHLY recommended. This ensures OpenClaw’s activities and file executions remain completely isolated from your sensitive personal data and primary login sessions.
3. Brave Search API
This gives OpenClaw access to real time information.
With the API, OpenClaw can:
- Search the web autonomously
- Gather up-to-date data
4. Telegram bot (Input)
 Telegram serves as my primary command center for the system. It allows me to send tasks and instructions to OpenClaw from any device and receive real time progress updates on my tasks.
⚠️ Security Note: You can connect OpenClaw to your main Telegram account, but for safety, I used a burner account for this setup. It adds a layer of separation, so if anything goes wrong (like leaked tokens or unexpected bot actions), my personal information stays untouched.
IV. Installation
1. Follow the Official Documentation
Start by using the official installation script from the docs:
https://docs.openclaw.ai/install
⚠️ Security Note: There are many fake OpenClaw websites circulating online. Always use the official site to download and install OpenClaw. Using unofficial sources can put your system and API keys at risk.
Run this in your terminal:
curl -fsSL https://openclaw.ai/install.sh | bashThis one-liner handles everything:
- Installs Node.js (if missing)
- Downloads OpenClaw
- Sets up dependencies
- Launches the onboarding process
2. Create Your Telegram Bot
While OpenClaw is installing, we can start setting up Telegram, which will serve as our main interface:
- Go to @BotFather on Telegram
- Run /start
- Create a new bot using /newbot
- Copy your Bot Token
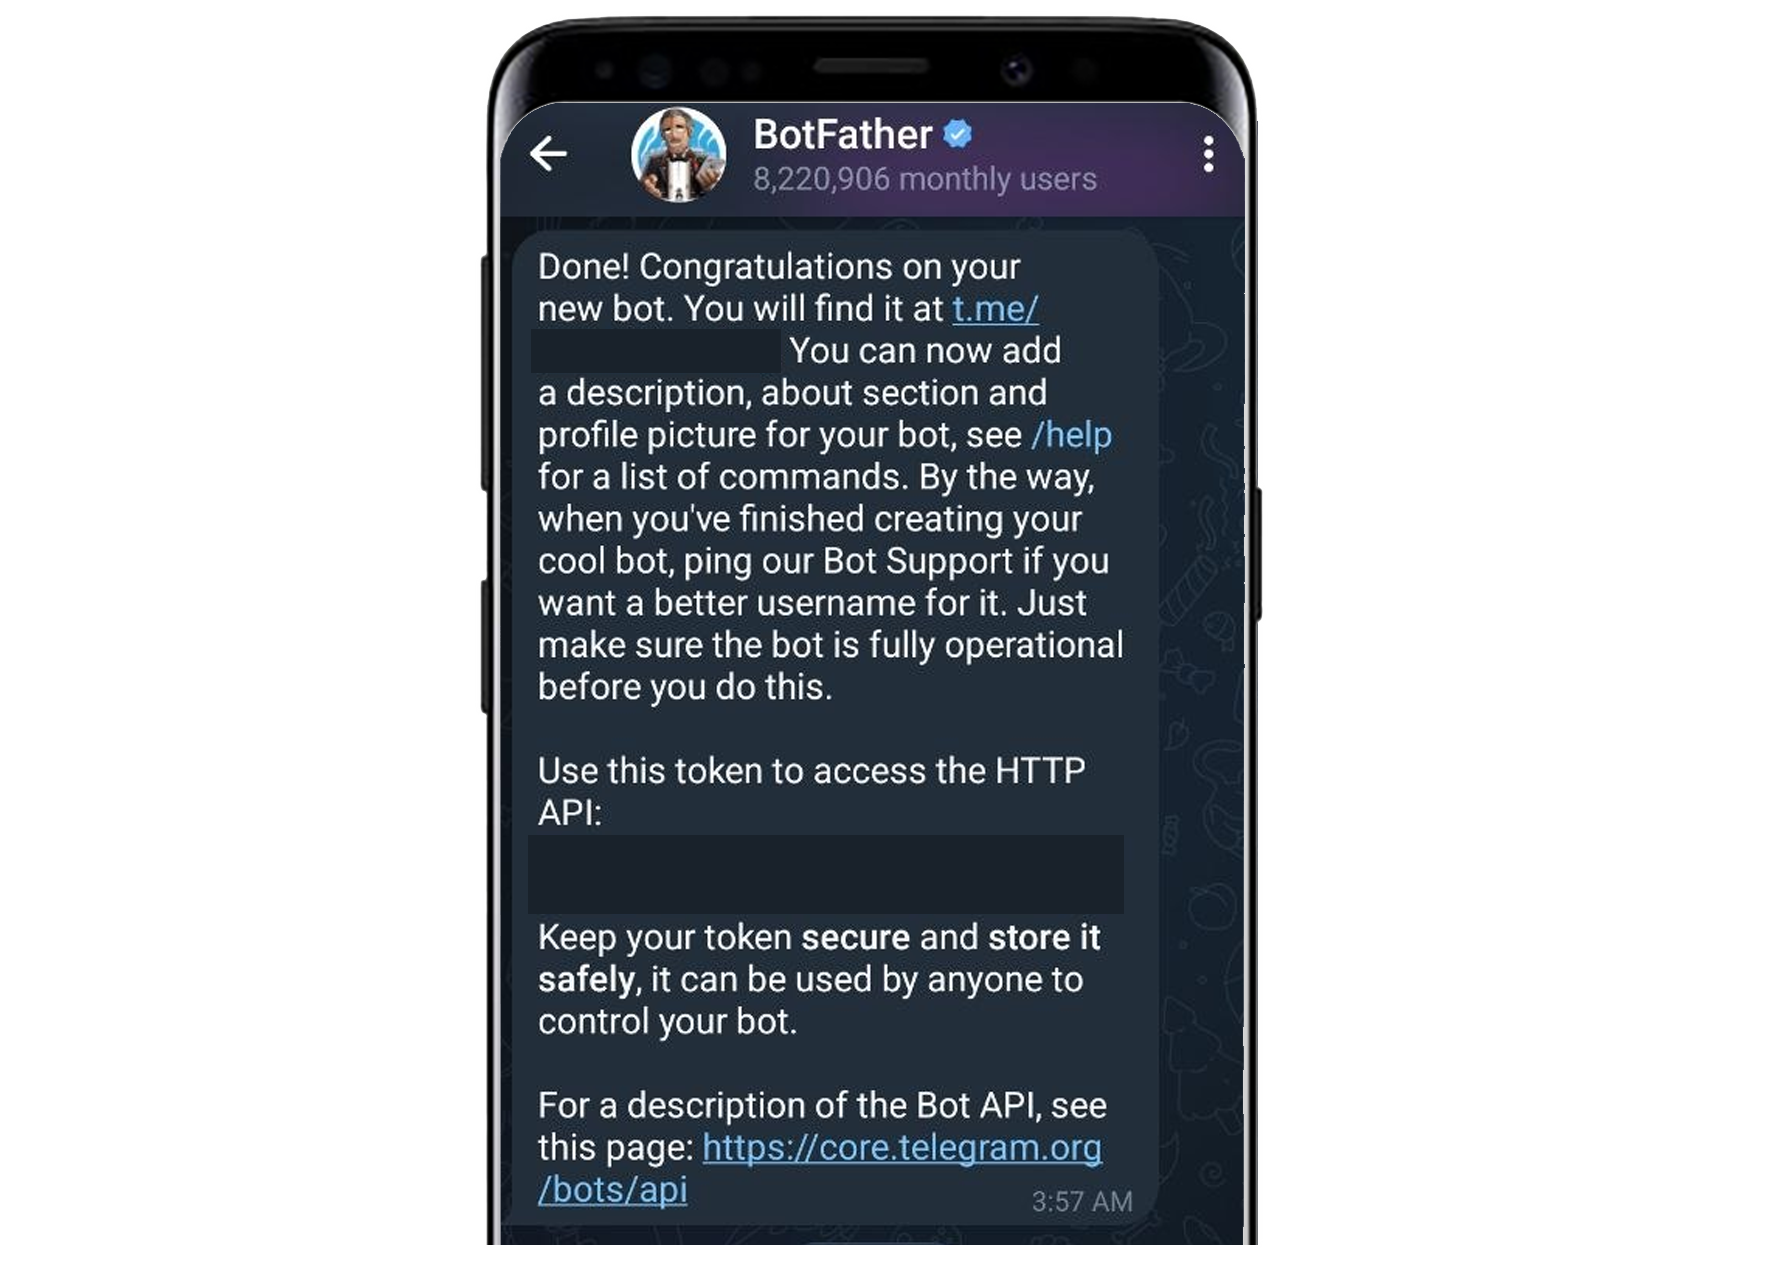
⚠️ Security Note: Delete the message from BotFather after storing the API key. Make sure to keep it secure, as it can be used to control your bot.
3. Onboard Your API Keys
After installation, you’ll need to connect your APIs:
- OpenAI API Key → powers the assistant
- Brave Search API Key → enables web browsing and real-time search
- Telegram bot → input/main interface
Run the onboarding (if it doesn’t start automatically) and follow the instructions:
openclaw onboard --install-daemon4. Verify Installation
Once everything is set up, run:
openclaw doctor
openclaw status
openclaw dashboard
These commands help confirm everything is working properly and open the web UI.
V. How I use OpenClaw
1. Assistant
Let’s start with the most obvious (and the most boring) use case.
OpenClaw can function as a general AI assistant, similar to tools like ChatGPT or Google Gemini. You can ask questions, generate content, summarize text, or get help with everyday tasks.
The only difference is you are connecting to it via Telegram. While this use case isn’t that groundbreaking, it’s almost certainly the first thing you’ll try after installation. It’s the easiest way to test if everything is working, from there, you naturally start exploring deeper features like skills.
2. Skills
A Skill is a reusable package of functionality that allows an AI agent to perform specific tasks it can’t do out of the box. Think of them as “plugins” or “tools” that give the agent new abilities. Each skill has a trigger this could be a command from Telegram or an internal prompt.
Skills are modular, so you can add, remove or customize them without breaking the rest of the assistant.
How to Create a Skill
Every skill is essentially a folder containing a Markdown file that acts as the instruction set for that specific capability.
my-new-skill/
├── SKILL.md        -- (Required)The core logic and metadata
├── script.py       -- (Optional) Any helper scripts
└── package.json    -- (Optional) Dependencies
Writing SKILL.md
The SKILL.md file uses YAML frontmatter at the top to define metadata, followed by natural language instructions for the AI. If you don’t follow the correct format, you won’t be able to see the skill afterwards.
3. Cron Jobs
Cron jobs are one of the most practical features you can take advantage of when working with OpenClaw. At its core, a cron job allows you to schedule tasks so they run automatically at specific times or intervals. In OpenClaw, this becomes especially useful when you want your workflows to run without manual intervention. Instead of triggering actions yourself, you can let the system handle execution exactly when you need it.
Some simple but powerful uses include:
- Running recurring tasks without needing to log in
- Automating routine workflows
- Triggering actions during off hours (Do tasks before your token reset)
VI. What’s Next?
As we explore more of OpenClaw’s features, we start to notice that not all skills are created equal.
There’s an emerging space around malicious use cases, given how flexible systems like OpenClaw can be pushed beyond their original design. These cases are particularly interesting because they introduce new styles of evasion and obfuscation.
Skills can be misused and behave in unexpected ways, but this is a topic worth exploring in its own dedicated blog.
Feel free to reach out via leekristiancao@gmail.com if you have questions, suggestions or need more details about this guide.